DIY gate with a beautiful wicket. Swing gates with electric drive: tuning the area with your own hands Drawing of swing gates 4 meters
Swing gates - not a single rural yard in Russia, not a single country house, can do without them. It doesn’t matter what their design is: solid metal or wood, openwork forging or simple welding of rods, angles, pipes.
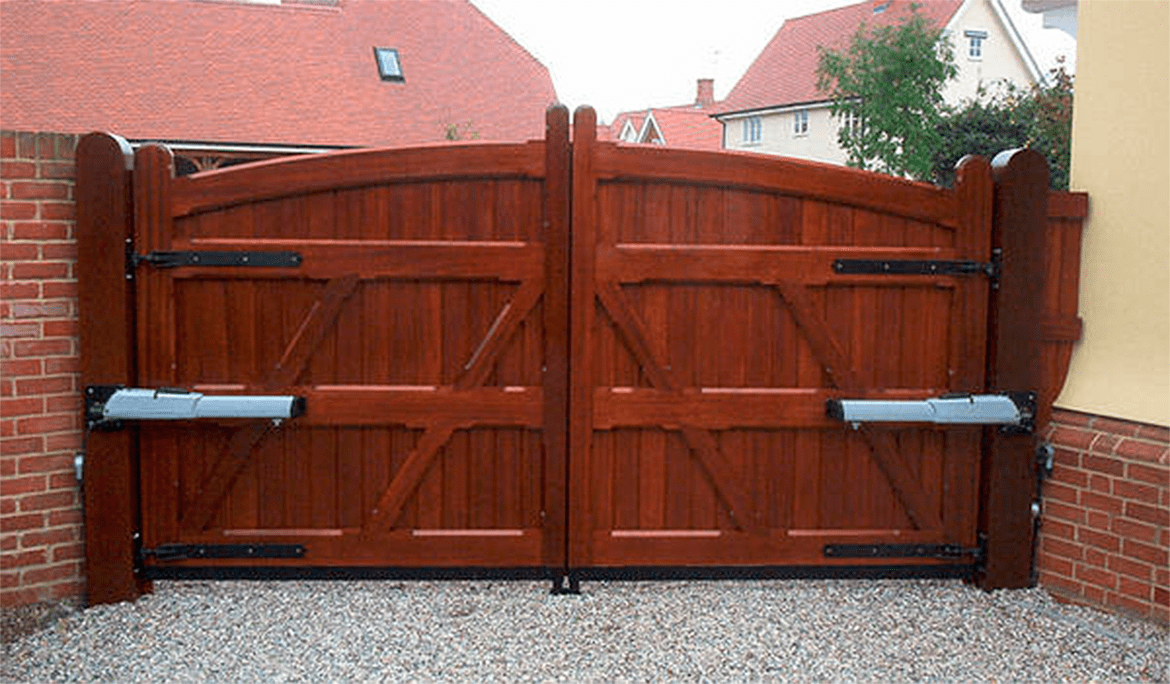
You can make it yourself
Their design is the simplest of all known: sliding, lifting, single or double leaf. They let in and out the owners’ car, a cargo scooter “Ant” or a walk-behind tractor with a trailer. They can be equipped with a yellow signal light or an antenna for remote control of the “close-open” mechanism. With a gate for adults and children in one part of the plow or separately next to it.

For those who have not yet had similar ones, read our recommendations for creating entry barriers, look at photos of gate drawings, collect the necessary tools, purchase materials and start working on your own.

And if you decide to build a garage in the yard, then the experience gained from assembling a plow on the estate will also be suitable for installing the entrance to it.

You can also download a drawing of a garage door on the website. The design of these gates is simple and clear, installation is simple, easy to open/close, and reliable.


Device principle
The design of such fences has remained unchanged for centuries. Only the materials for plowing are changed. To the traditional options (made of simple metal or wood), elegant profiles and polycarbonate are added.

The advantages of plowing are:
- ease of assembly and installation
- minimum cost when assembling with your own hands
- durability
- ease of maintenance
- Suitable for office areas, technical complexes, garage cooperatives
- Variation in sash widths up to fifteen meters

Let's pay attention to installation
The gates are mounted on side posts made of pipes with a diameter of 10 cm, a welded pair of corners or ready-made profiles. They are concreted to a depth of at least a meter so that the frost does not “drive” the gates.

The height is enough to be two meters, the same width of each door. They swing open either immediately or each separately, into the yard or out. This needs to be thought through right away. They are hung on hinges that are well lubricated with a graphite mixture so that they do not creak.

When closed, if there is no opening mechanism, they are fixed in several ways. Either transversely with an inch pipe mounted on a pair of hooks for each plow, or with fasteners at the junction of the mortars, mounted in the concrete. The lower fastening will also be needed in the case of simply fixing each plow.

The cladding, painted corrugated sheeting or polycarbonate, is attached to the frames with bolts or self-tapping screws. The last hardware per square meter of fastening is needed eight to ten pieces.

You leave the last material in its translucency or paint it with a color of your choice. The corrugated sheeting, which continues in the form of a fence from the gate along the entire length of the front part of the estate, looks good.

The disadvantage of the goal format is its large turn. This is a particular drawback for winters, when a lot of snow must be cleared in order to open the gate.

Mechanization
This convenience will have to be purchased as a finished product, but it will take a long time to make it yourself. The mechanism is similar to a door closer in entrances, only much more massive and powerful.

You can install it closer to the ground if winters have little snow, or better in the middle of each side of the gate. For the middle, less bulky door closers are sold.

In both cases, it is necessary to weld the structures to the fasteners of the plows. Our descriptions are minimal; you can see all the procedures in detail on the video of the gate drawings.


Alternative to swing gates
If swing gates do not suit you due to the opening area of the gate, look at possible drawings of sliding gates. Perhaps build them yourself. Only such gates will become twice as heavy. Because instead of the area of two swing doors, here they will be welded together. A cone will also be added at one end of this design.

It is necessary to completely cover the entry space. Therefore, manually moving such gates along one line along the fence is problematic.

Therefore, a mechanism is needed in the form of a gearbox or worm gear on the teeth of the slide. For winter use, it is necessary to consider protection from snow and rain.

Their length for a standard estate gate is four meters. The driving angle adds at least another 1.6 meters. The fastening is radically different from swing ones.


Along the length of the gate, a profile-slide is installed at the bottom to move the structure along it. On both sides of them there are rectangles embedded in concrete with a height slightly higher than the gate with a distance between the verticals of 10-15 cm. The frame moves through them, and when closed they hold it. On one side, you concrete the platform for two meters, and on it you strengthen the continuation of the profile and the entire movement mechanism.


You can also download a drawing of a garage door on the website. Below we will talk about one garage structure.

Overhead garage doors
There are two more types of gates - overhead and garage. The lifts themselves are mounted in a detached garage or built into a building. They are not suitable for open air, since they have a complex design for the street. When rising, it will create windage in the wind, which will lead to deformation of the frame.

A drawing of a lift gate for an integral garage shows that it can be opened in winter even if there is a snowdrift in front of the engine room.

The entrance leaf simply goes up along the lower slide, and the two upper wheels along the same guides lead the structure almost horizontally.

If the gate is made not of too thick metal, but of a profile, then you can raise and lower it manually. Provide a soft seal along the contour of the gate against wind, snow, and rain.


Photos of gate drawings


When homeowners are constructing fencing around their properties or in the process of constructing garages, the need to solve the problem of building a gate always arises. First of all, it is necessary to accurately determine the appropriate type of gate. In this matter, an important role is played by the calculation of the smallest nuances, since situations often arise when, after installing the gate, you have to do additional work to arrange your site. It is for this reason that the design features of various types of gates should be studied before purchasing materials.
- Recoil;
- Swing;
- Lift-and-swivel.
Each such design has its own specific differences, so it is necessary to study them separately.
DIY swing gates
Construction stages:
- Installation of hanging racks.
- Making the gate itself.
The sequence, of course, can always change.
The following materials can be used as racks:
- Profile pipe with a certain cross-section;
- Reinforced concrete pillars;
- Masonry made of brick or natural stone. In most cases, stone is used for cladding purposes;
- Ordinary wooden beam.
Let's consider the existing methods of installing poles:
- Metal pipes are buried in the ground to a depth of approximately 1.5 m. This technique will always differ from others in terms of financial benefits and time savings. There is also always the possibility of emergency replacement of the rack. To avoid misalignment, it is recommended to strictly maintain the same level when burying pillars;
- Equipment of a kind of concrete foundation as a base for pillars.
More attention should be paid to the second installation method.
Sequencing
- Using an earth drill, a pit is dug, the minimum depth of which should be 1 m;
- A special cushion for concrete made of sand and crushed stone with a thickness of 150-200 mm is equipped. Such a platform is necessary so that the rack never deepens;
- The pillar is installed and gradually leveled using a regular building level;
- The stand is poured with concrete.
To assemble the gate, you need to determine the size of the upcoming structure. To simplify the work, it is recommended to create a drawing in which all dimensions will be indicated.
 After this, you can begin manufacturing parts for the frame according to pre-made drawings. When performing welding work, you should always remember safety precautions. It is advisable to entrust this matter to a qualified specialist. You should always remember that the number of stiffeners largely determines the resistance of future gates to external weather conditions. If pipes are used as racks, it is advisable to prevent water from entering them.
Gates can also be decorated with products made by cold forging. After the gate is assembled, you can put it on the hinges.
Let's list the main advantages of swing gates
- Economical;
- Relative ease of installation;
- All stages of installation can be performed on your own without much difficulty;
- To make such a structure, different materials can be used.
Disadvantages of swing gates
In general, installing swing gates is not difficult.
DIY sliding gates
Sliding gates are a little more difficult to install. When equipping such a structure, brick pillars are placed on both sides, on which rollers are fixed, holding brackets and fixing elements at a certain height.
The main weight should always be supported by the channel, which is fixed to a securely installed foundation on the inside of the gate or to iron supports.
 You can install a solid foundation or several strong pillars under the channel. For the foundation, you will have to equip a pit, at the bottom of which there will be a cushion of crushed stone and sand. After this, formwork with waterproofing is placed in the pit. A reinforcing grid is installed in the formwork, after which concrete is poured into the pit.
A channel with reinforcement is mounted on a concrete foundation. This element is strongly pressed into the solution until it is completely immersed. When the concrete hardens completely, you will get a fairly strong iron platform. Only after the concrete has hardened and the channel has been installed are the gates themselves installed.
 For the frame, you can use a square pipe or an ordinary iron corner. Additional stiffening ribs are necessarily welded to the square frame to increase the stability of the created structure. Each weld seam must be cleaned of the resulting slag. The frame is primed and then covered with a special paint that can protect against corrosion. Only after this can corrugated sheeting be installed on the frame.
When all the constituent elements of the structure are prepared, and the foundation with the built-in cantilever channel becomes strong enough, you can begin attaching the components of the sliding system.
Installation of a sliding system

Cantilever beams are mounted at different heights. When developing such structures, sizing must be done with particular accuracy, since the console can be deformed even with the smallest errors.
The disadvantages of sliding gates include only 2 features
- Compared to swing gates, sliding gates are a little more expensive.
- To be able to roll back, you will need a little space along the fence.
We list the main advantages of such gates

More information on installing sliding gates can be found in this video:
Installation of overhead gates
First of all, it is necessary to design the lifting and turning system. To do this, you need to change the dimensions of the opening and draw up a suitable sketch yourself or find a suitable drawing. After purchasing all the components and tools, you can begin installation, which consists of the following steps:

After the assembly is completed, finishing and painting work can be carried out. There should be a special groove for the seal at the bottom of the profile.
Advantages

The disadvantages of lift-and-turn systems include

More information about installing lift and slide systems can be found by looking at this
video:
To ensure the safety of a residential premises or industrial facility, it is customary these days to install fences and gates. Today, modern homeowners use three main gate assembly technologies. The essence of technology lies in the way it is discovered. Collecting any variety with your own hands will not be difficult for anyone.
Do-it-yourself swing gates are one of the most common types of gates, which are chosen when improving small private plots and large private areas. The choice of these particular gates is justified by the fact that they are easy to install and reliable during active use. By installing such gates on your site, you can not only protect your property, but also save money. Below we will look at the features of such structures and figure out how to install them yourself.
Advantages and disadvantages
Like every design, such gates have their own advantages and disadvantages; we will consider them in more detail below:
- Advantages:
- relatively low cost, which will be a pleasant bonus to the installed gates;
- ease of installation;
- long service life of the installed structure;
- installation can be done on your own;
- installation can be done with your own design modifications;
- if there are no restrictions in volume, then accordingly there will be no restrictions on passing transport;
- you have the opportunity to choose on your own what material you will make the structure from, respectively, from suitable options.
- Flaws:
- for durable installation, it will be necessary to bury the pillars quite deeply, and this is not always easy to do with your own hands;
- concreting these pillars takes a lot of time, and if concreted incorrectly, the pillars may warp over time;
- a very large space will be required to install such a barrier;
- it is unsafe to use such structures in strong winds, because it will be almost impossible to control the doors;
- When installing an electric drive, you must purchase several wires to close/open the gate, which will increase the cost of your purchase.
As you can see, the advantages of such structures outweigh the disadvantages, and if you live in a region where strong gusty winds are not the norm, feel free to proceed with the installation of swing gates on your site.
Types of metal structures
Before you start assembling your new gate, it will be important to decide on its design. The choice should be made taking into account a number of features, the main one of which is the frequency of operation. Using metal you can make various variations, we will consider each of them separately.
Single leaf
Iron gates of this type are not very popular. This is a solid canvas that is not particularly practical to use. In order for them to work perfectly, it is important to reliably strengthen the supports; a lot of money will have to be spent on this. When you decide to install the structure in a garage, take care of constructing a powerful and reliable metal frame, and also do not forget to attach the hinges. The disadvantages include the need for space for the sash to function.
Bivalve
The most popular and practical to use. You can install them yourself on your site without any difficulties. The structure is made of 2 canvases that are the same in size, therefore, you will need to make a frame from two frames and cover them with sheet material.
Double doors with gate
They are very practical for daily use. They are manufactured like the previous design, the only difference is the presence of a special gate on one leaf. If you plan to install this type of structure in a garage, you must choose a mortise type of gate.
How to make swing gates with your own hands
By following the guide given in this article, you can make swing gates yourself. To do this, you will need to strictly adhere to the drawing, because the work requires a precise approach. If it is difficult for you to draw up a drawing yourself, then diagrams and sketches of such structures will not be difficult to find on the Internet, which can be taken as a basis.
Create a sequence of actions:
- foundation and pillars;
- frame work;
- sheathing
Let's look at each step in more detail below.
The basis of the structure will be a metal frame; its fastening must be done in the entrance opening. It will also be necessary to install strong supports. When creating a drawing, mark the markings on it, as well as the locations of the main objects of the future structure. The optimal parameters will be the following: height 2 m, and the length of each leaf is also 2 m. The leaves can be made with 1 or 2 horizontal crossbars, which act as stiffeners.
For additional reinforcement, you can make 2 diagonal and 1 transverse crossbars.
Installation of pillars
Work on installing swing gates should begin with the installation of support pillars. You can choose a concrete or brick pillar, a wooden beam, but as practice shows, it is better to give preference to metal structures. If you choose brick pillars, then you need to lay pipes or channels inside them, and you will need to remove the embedded corners from the steel corner or their reinforcement in order to subsequently attach the racks with hinges.
Metal pillars must be concreted to a depth of at least one meter. This indicator should be equal to the depth of soil freezing. A reinforced foundation is also laid under the brick pillar to a depth of one meter.
Algorithm for installing support pillars from pipes:
- clean the pipes from rust and then degrease them with a suitable substance;
- prime the surface of the prepared pipe, then paint it to match the selected profiled sheet;
- measure the width of the future doors, in which dig two holes 1-1.5 m deep;
- Place sand and crushed stone at the bottom of the dug holes. You should get a pillow 20-30 cm thick;
- the support post is installed in the prepared pit and secured with reinforcement;
- Using a building level, level the position of the pillars;
- Fill the hole with concrete, which you prepare from fine crushed stone, river sand and cement.
The resulting foundation should be left to harden for at least a week. If the doors are heavy, with forged elements, then the drying period for the foundation should be increased to two weeks. While the concrete dries, you can start making canvases and frames.
Installation of the foundation and pillars should be carried out in the warm season.
Manufacturing
Now you can start making the frame for the swing gates. To do this, prepare the site where you will work. You have to follow the following instructions:
- the pipe that you will use for the frame must be cleaned and degreased, then primed and painted;
- in most cases, the doors are rectangular in shape, but there are exceptions. It is worth understanding that if the upper edge of the gate has a rounded shape, then the pipe will need to be bent; for this it is better to contact professional craftsmen;
- cut the pipe according to the dimensions according to the drawing, cut angle 45C;
- Place the prepared pipes on the work surface, check the evenness of the diagonals using a tape measure;
- Now you can grab the frame by welding;
- again check the evenness of the corners and diagonals, if necessary, trim them and finally weld the pipes;
- it is necessary to weld a corner on the inside of the frame, keep the angle between the joints at 45C;
- Weld the so-called “kerchiefs” at the corners of the frame, this is necessary to give additional strength to the frame;
- Now you need to weld the crossbars to the frame. Experts recommend placing horizontal crossbars at a distance of 40-50 cm from the bottom and top edges;
- If you plan to install a lock, now is the time to make a box for it from sheet iron. It will provide reliable protection for the mechanism from the effects of precipitation;
- the plumb lines must be moved from the support pillars to the side posts of the frame being manufactured;
- attach the awning counterparts;
- sand the areas where welding was done, treat them with a primer and paint.
The algorithm for installing swing gates with your own hands is not as complicated as it might seem at first glance; follow the instructions given and you will certainly succeed.
At the next stage, it’s worth thinking about how to cover the swing gates. In this case, corrugated sheeting would be the best choice. Seam the fabric in accordance with the following recommendations:
- Place the corrugated sheet on top of the prepared frame and attach it with steel rivets and self-tapping screws. Decorative rivets will look aesthetically pleasing, but if repairs are necessary, it will be difficult to dismantle the canvas.
- The corrugated sheeting should be fastened only in recessed areas, these are the so-called “waves”.
- The number of screws per 1 m2 is 8-10 pieces. This is the optimal indicator.
Once you have finished covering the frame, the finished sashes can be hung on the hinges on the support posts. In this form, the gate can be used quite well, but if desired, you can improve it by adding an automatic system for opening the doors.
Installation of automation
The automatic system for swing gates is quite practical and you can easily install it yourself. To make the gate automatic, you will need to install at least a couple of drives, then connect the control unit and buy at least one device to control this system. In order to achieve greater safety when opening the gate, you can also install a warning lamp and photocells.
Please note that different drives should be selected if the sashes open inwards and if the sashes open outwards.
Schemes and drawings


The sight of a beautiful decorative gate against the background of a corresponding fence always impresses passersby, and if they are also made by the hands of the owner, they are doubly impressive. To say that it is easy to create an entrance group for a site yourself means to deceive the reader. But it also cannot be said that this is unrealistic. Making a gate correctly with your own hands is difficult, but doable.
Preference for swing design
Novice craftsmen, of course, will not risk immediately making complex structures with intricate mechanisms at home, but everyone can make and install the well-known and beloved designs of swing gates and try them on their own.
But, before you start creating in the garden from scrap materials or from boards, it is better to make or order a drawing of the gate, calculate the amount of material needed, provide the workplace with equipment and tools, and only after that you can make a gate with your own hands for the garden fence , or, to the front entrance of a private estate.
Preference is often given to this option as swing structures for several reasons:
- they are easy to manufacture;
- in comparison with other entry groups, it requires less material costs and manufacturing effort;
- a high-quality product will serve its owner for a long time;
- a huge selection of materials for cladding;
- possibility of installing automation;
- a lot of decoration options;
- easy operation.
The listed advantages are accompanied by only one, but significant drawback - the necessary distance is needed to open the gate leaves in or out of the yard. And garden plots do not always have enough space. But if there is no such problem, then you can safely start manufacturing.
Gate elements

This is the most ancient design, which has been subject to modifications for centuries, but nothing has fundamentally changed, all the constituent elements remain the same:
- Support posts are an important part of the gate, which supports the entire weight of the gates and the wind load. Therefore, their installation must be taken with the utmost seriousness. The material is often metal. And even if the supports are made of brick, their core will in any case be metal, since the hinges for the sashes need to be attached to metal.
- Gate leaves consist of a frame, the material of which can be either metal or wood. Although the same metal is more popular, as it is stronger, more reliable and more durable.
- We have already mentioned the finishing, that is, the lining of the doors, but this is also an integral attribute of the design, and we should not forget about the weight of the material. The heavier the skin, the more reliable the frame needs to be made, taking into account the wind load of the region.
- Hinges for the structure also play an important role, so when selecting them, it is advisable not to think about saving, it is better to do this on something else.
- The owner selects locks, latches, clamps and other accessories at his own discretion, but also taking into account the total weight of the structure.
We have figured out the general appearance of the product, so you can start thinking about how to make a gate according to the drawing and calculate the material.
Often, the installation location of a product directly affects the material and appearance of the product. If, for example, you need to install an exit gate in an almost invisible backyard or garden plot, or simply enclose a construction site with a temporary fence and entrance gate, then the design requirements will be simplified.
For ceremonial decorative entrance openings, the requirements are more stringent, and accordingly, the costs of the entire event can double.

The choice of material has a direct bearing on the size of the entrance group, the weight of the structure and many other factors, including natural ones.
But according to experts, a profile pipe with a cross-section of 60*40 mm, where the metal thickness is 1.5 - 2 mm, is more often used for the frame of the sashes. A pipe with a cross-section of 40*20 mm may also be suitable, it all depends on the weight of the casing.
The cross-section of the pipe for the support pillars also depends on the weight of the structure, but it is better to be guided by the knowledge of specialists who claim:
- for a total weight of the valves not exceeding 150 kg, you can use a pipe with a cross-section of 80*80 mm and a metal thickness of 4 mm;
- above 150 kg and up to 300 kg - it is advisable to use a 100*100 mm pipe with a thickness of 5 mm;
- above 300 kg, a pipe of 140*140 mm, with a thickness of 5 mm, is used.
Regarding the hinges, you can choose any mechanisms - adjustable or non-adjustable, but the material from which they are made must be of high quality so that the mechanisms can withstand the weight of gate leaves made independently.
Installation of support pillars

Maybe someone thinks that home-made entrance products in a garden or on a site will never turn out neat and beautiful. But, as practice has shown, if you approach production with all responsibility and even pedantry, then with your efforts you can surpass the products that are offered on the construction market.
Do-it-yourself gates, be they the simplest country gates, made from scrap materials, but correctly calculated and made strictly according to the drawing, will be unusual and unique.
So, we build, observing dimensions, distances and constantly measuring the correctness of all angles, verticals and horizontals.
First of all, you should install the supporting elements on which the sashes will be hung. Brick pillars must have embedded elements. One part of the loops is welded to them.
If the garden gate supports are supposed to be made of metal, then they must be strengthened. To do this, holes are drilled to a depth of 80–120 cm, the bottom of the hole is filled with sand or crushed stone, pillars are installed at the level, secured with wooden or metal spacers, filled with cement mortar and compacted.
Frame calculation and welding

While the solution hardens, you can begin making frames. You can't do without welding here. Pipes cut strictly to size are connected to each other by welding. It is important to carry out the welding process on a special table or on a flat surface to avoid distortion.
Welding should take place in stages. First, all the parts are tacked in several places, then the correct welding is checked diagonally and in the corners; if everything is extremely accurate, then you can start finishing welding.
If rusty pipes are used to make garden gates, then it is advisable to clean them of rust before welding. Then the seams will be smoother and of higher quality.
After welding, you should thoroughly clean all the seams, coat the frames with a primer, wait until completely dry and paint.
For a standard frame you will need the following material:
- the perimeter of the frames and lintels can be made from 60*40 mm pipe. In total, you will need to purchase 22 m;
- The internal frame for strengthening the frames is made of a 40*20 mm pipe; it will require 15 m. The sheathing will be attached to this internal frame.
Since pipes are sold in linear meters, the best option would be to order the required dimensions that correspond to the dimensions of the diagram. This approach has a double benefit - there will be no need to measure and cut the required length at home, and delivery will also be simplified.
Product sizes

Ideally, the gate should be built together with the fence. But there are times when there is a need to widen the passage, or old products have broken down, then before making new structures it is necessary to make calculations as accurately as possible.
And it is desirable that the stylistic solution fully suits the fence. If, for example, the fence is made of brick, then bricks will definitely have to be used for the gate posts of such a fence. If the garden fence is low and made of boards, then the option of decorative high wrought iron gates is unlikely to harmonize with such a fence.
When taking measurements and calculating the material, the coverage of access roads should be taken into account. If there is asphalt, concrete or tiles at the entrance area, then it is enough to leave a gap of 5 cm. And when the garden path is overgrown with grass, then it is better to leave a gap of 10 cm for the smooth opening of the doors.
It is also advisable to provide a gap between the sashes in order to level out the slight displacement of the pillars over time.
Installation of sashes

This process begins with attaching the hinges, which are welded to the main frame of the sash and to the support posts. If the post is made of brick, but no embedded element was provided, then a channel is attached to the brick with a dowel, and hinges are welded to it. Well, if everything is provided for in a brick pillar, then there should be no problems with attaching the hinges.
By the way, these small but important elements also have their own installation instructions, which are included in the kit. Therefore, it is better to carefully study the instructions before welding.
When all welding work is completed, a control cleaning of the seams and painting should be done. Only after the paint has dried can the doors be mounted on the hinges.
Next, the installation of all the remaining fittings is carried out - locks, latches, latches, automation. These elements of the entrance group, undoubtedly, must be installed strictly according to the diagrams included in the kits. And if the valve can still be attached without instructions, then it will not be possible to install the automation without a diagram, and it is difficult to attach the lock without carefully studying the diagram or instructions.
Finishing
Do-it-yourself sliding gates - drawings, diagrams, installation and design details. We have made 100% free sliding gate drawings for you.
You no longer need to scour the Internet in search of sensible drawings, stumbling upon ancient drawings that are devoid of practical meaning, you don’t need to give your Viber or other messenger so that sectarian managers will call you for months. There is no need to buy components at exorbitant prices from companies that promise a “free” drawing when you purchase their product, etc.
"HOW TO MAKE SLIDING GATES WITH YOUR OWN HANDS"
We tried to create a database of sliding gate drawings so that every user who decides to make a sliding gate with their own hands can easily find useful information for themselves. You can find out the general theory about the design of sliding gates in the article sliding gate diagram. It is better to view the drawings on a large-diagonal tablet, desktop computer, or print it out.
BUY SLIDING GATE ACCESSORIES.
A few words on how to use the database. Let's say you have a classic opening 4 m wide. Find a drawing in the range that your opening falls into and feel free to make a gate along it. The fact is that sliding gates must cover the opening in each direction by 100-200mm. Firstly, the gaps are closed, and secondly, such overlap is necessary for proper fixation of the gate with catchers and an upper limiter. In the drawings, the covering of the opening with a sash is indicated - D, there is never too much of it, there is only a little. This is another important advantage of sliding gates - it’s harder to “mess up”
That is, for an opening of 3.9 m and 4.1 m, the sash will be the same, only parameter D will differ, 200 mm and 100 mm, respectively, which is within normal limits. For the required opening of 4 m, the covering will be 150 mm in each direction, which is excellent.
If your opening is, say, 4.15 m, then do it either like 4.1 or like 4.2, it will still work out correctly.
BUY AUTOMATION FOR SLIDING GATES PRICE
Regarding the height of the gate. The database contains drawings for an opening 2 m high from the level of the finished floor; if you have more or less than 2 m, then add or subtract the desired distance from the frame heights and that’s it.
Example: let’s say the height of your gate from zero (in the drawings - H) is not 2m, but 2.5m.
Add 500mm to all heights. and we get: H=2500mm, H2=2430mm, H1=2370, h3=2310mm, h4=2230mm. All.
The same thing applies to the direction of opening - the database contains gates that open to the left, when viewed from the yard; with a right opening, everything will be the opposite without any design changes.
HOW TO CHOOSE THE CORRECT ACCESSORIES FOR SLIDING GATES.

The recommended fittings for sliding gates with a width of 3-5.4 m are SP PREMIER STANDART-500. Your gate will move easily, smoothly and silently. That's how it is in the video.
With fittings from another manufacturer, such a smooth and quiet gate operation may not be possible.
As they say, feel the difference. Gates with fittings from one brand widely advertised on the Internet:
FREE DRAWINGS OF SLIDING GATES:
Drawing of a sliding gate with an opening of 3.0-3.2 m (click to enlarge)

Drawing of a sliding gate with an opening of 3.3-3.5 m (click to enlarge)

Drawing of a sliding gate with an opening of 3.6-3.8 m (click to enlarge)

Drawing of a sliding gate with an opening of 3.9-4.1 m (click to enlarge)

Drawing of a sliding gate with an opening of 4.2-4.4 m (click to enlarge)

Drawing of a sliding gate with an opening of 4.5-4.7 m (click to enlarge)

Drawing of a sliding gate with an opening of 4.8-5.0 m (click to enlarge)

Drawing of a sliding gate with an opening of 5.2-5.4 m (click to enlarge)

Drawing of a sliding gate with an opening of 5.5-5.7 m (click to enlarge)
Please note that from this gate size onwards a large guide 94x85x5 is used.
Recommended fittings for gates with a width of 5.4-10 m are STRONG-800 or Roll Grand #1 up to 800 kg.

Drawing of a sliding gate with an opening of 5.8-6.0 m (click to enlarge)

Drawing of a sliding gate with an opening of 6.0-10.0 m (click to enlarge)
For such gates, fitting kits for 800 kg with a guide 94x85 and a wall thickness of 5 mm are also used. We recommend STRONG-800 or Roll Grand #1 up to 800 kg.
The technology and methodology remain the same. We calculate the length of the gate structure using the formula: Lopening*1.5+200mm. Where Lopening is the clear width of the opening, the length of the counterweight is 0.5 from Lopening, 200mm is covering the opening with a canvas of 100mm on each side. For such large gates, it is highly advisable to make the counterweight part equal to half the opening. That's all the nuances.

In this article we will tell you about the main secrets and nuances of manufacturing sliding gates. Sliding gates are the best solution for organizing entry into a yard or enterprise territory. Let's consider their advantages: simple kinematics - sliding gates move (roll away) along the fence, requiring less labor to opening and closing are easily and cheaply automated, do not require fixation in the open position - they will not be closed unexpectedly, for example, by the wind, as happens with swing gates. To manufacture sliding gates, special components are required - the so-called fittings for sliding gates or otherwise sliding gate mechanism.
In addition, sliding gates, unlike classic swing gates, require space for rolling back the door leaf and a special foundation. See fig.

To calculate how much space is needed to roll back the gate, you need to multiply the clear width of the opening by 1.4. In other words, the space for sliding should be 40% greater than the width of the opening, since sliding gates consist of a door leaf and a counterweight, the length of which is 40% of the door leaf.

If your site meets these conditions, then you can get down to business. If there is a shortage of space, then the minimum possible length of the counterweight for normal operation of the gate will be 33% less; it is no longer possible - the gate will peck and it will be difficult to “walk”; if there is no space at all, then we must admit that sliding gates cannot be installed and it is worth considering other types, for example, swing, roller, etc. Sliding gates with a wicket - these nuances are described.

So, if everything is in order with the place for the sliding gate, then we proceed to constructing the opening for the sliding gate. First, you need to install pillars enclosing the opening, we will not dwell on this in detail because everything is clear here, we will only note that the pillars should not wobble, be concreted taking into account the depth of soil freezing, and also mortgages (3 pieces each) should be placed on the surface of the pillar facing the courtyard, the strips will subsequently be attached to these mortgages, we will come to this later. The optimal size of each mortgage is 60x60mm. The mortgage must be flush with the brick or protrude slightly; connection with the central pipe in the column is required. If the pillars are metal, then mortgages are not needed - the strips will be welded directly to them. An example of a well-prepared opening:

Scheme of concreting the foundation of sliding gates with electrical wiring: Clickable. More information about the foundation -

After installing the pillars, we proceed to pouring the foundation. You need to dig a hole half the width of the opening. We start from the edge of the opening and move towards the rollback of the gate. The width of the pit is 400-500 mm, the depth is 1000-1500 mm, depending on the soil. For quicksand, swamps, and quicksand, we study construction documentation for foundations. The foundation should not sag, be subject to seasonal sinking, pushing, etc.
After our pit is ready, we make a “banquette”, see fig. higher. We take a channel 10-16 cm wide and also half the width of the opening, weld reinforcement with a diameter of 10-14 mm to the shelves and form an adequate spatial grid from the reinforcement. Next, we fix the bench in the hole, set the surface of the channel to the level of the “finished floor” (final asphalt or tiles), in addition, the surface of the channel must lie exactly at the horizontal level, this is important. We lay the channel close to the post. After this, we fill the pit with solution and wait a week or two.
As a result, after this we will get the following foundation:


The photo above shows the foundation for the sliding gates laid out in the “clean zero” of the yard, but the area will still be filled up. Therefore, it is also important to determine the level of the finished floor of your site before pouring; you may have to install formwork. Now let's move on to manufacturing the supporting frame of the sliding gate.
As a rule, profiled pipes 60x30 and 60x40 with a 2mm wall are used for the external frame, but 50x50, 60x60 are also possible. First, we fence our pipes - remove rust, degrease and prime. In Fig. these pipes are shown in green. We form an external frame from a 60*30 pipe, make sure that all the necessary angles are right, the canvas is in the same plane, and we do not make the common mistake when the frame, usually in the area of the counterweight, lifts up a little along with the guide - everything should be smooth and neat. Welding seams must be continuous, without holes. To weld the gate frame, it is also convenient to use a specialized T-profile, this will significantly reduce the amount of welding work, since in itself it is already the desired combination of pipes 60x40 and 40x20.
Drawing diagram of a sliding gate device in the general case. External frame (green), internal sheathing (red), guide from the hardware kit (black).

The principle of forming a frame for sliding gates:

FREE DRAWINGS OF SLIDING GATES.
And this is a cross-sectional drawing of a sliding gate to help you understand the components of the gate height:

An example of a drawing of a gate frame for an opening of 4 meters and a height of 2 meters.

After this, you need to weld the internal frame (sheathing), which serves to ensure the rigidity of the structure, and also serves to fasten the lining - corrugated sheets, boards, polycarbonate, block house, etc.). The internal frame is made from a 20*20mm, 20*40mm pipe; it is easier to get into a 20*40 pipe with a rivet or a self-tapping screw. The internal frame is shown in Fig. above in red.
Distance “a” is equal to the width of the corrugated sheet used (often 1150mm); the joints of the sheets must pass along the vertical pipe of the sheathing. Distance "b" is equal to the distance remaining after sewing with solid sheets. The outermost sheet is usually always carefully cut to width using a grinder
It should look like this:

If the gate is sewn up on one side, then the inner sheathing can be moved to the edge of the outer frame towards the yard; this is true if the sheathing material is thick, for example corrugated sheeting with a “high wave”, sandwich panels, boards, etc. Welding work, as I already said, is carried out competently so that the pipes do not “lead”, we follow the principle of “chessboard order”. When the outer frame is ready and the sheathing is welded, we weld the guide from the fitting kit to the frame from below along the entire length. It is advisable to fix them with clamps. The guide rail must also be welded in a “checkerboard pattern”, otherwise the gate frame and guide may “lead” from welding and it will resemble a propeller. After this, we clean the weld seams, prime and paint the damaged areas. Sliding gate frame before covering with corrugated sheets:


When the paint is completely dry, we move on to sewing the fabric. We attach the lining material to the internal frame (sheathing) using rivets or self-tapping screws. Sliding gate frame after covering with corrugated sheet:


Please note that this section of the sliding gate counterweight is level and not “lifted up” and this is correct.

Let's consider some of the features of large openings, more than 5 meters. The figure below shows a drawing of a sliding gate for an opening 6 m wide and 2 m high. Please note the design of the counterweight part here is not triangular, but in the form of a rectangle with two diagonals. In addition, with a large opening length of more than 5.5 m, the counterweight should be made at 45-50% of the opening.

Well, the time has come to install the gate. The entire process of installing sliding gates with your own hands is perfectly illustrated in this video.
To begin with, we place the carriages on the foundation and spread them as far as possible within the limits of our counterweight (triangle). See fig.

but we mean that the end roller has a size of about 110 mm, so we place the carriage closest to the opening from the opening, taking into account this distance, and we place the carriage farthest from the opening so that it does not knock out the plug when closed. The wider between the carriages the better, but without fanaticism.

After that, we “roll” our sliding gate frame onto the carriages, set the sliding gates to the level and “grab” the heels of the carriages to the channel by welding, if everything is good, then we scald the heels, if we don’t like something, we set it up again, we achieve the desired result (the position of the gate in level, absence of distortions, etc.) and then scald. Then we weld the upper support rollers, install the end roller, and weld the upper and lower catchers. The rolling roller must roll onto the lower catcher and unload the gate in the closed position.
If your poles are made of metal pipes or channels, then the catchers and upper limiter can be welded directly to the pole. If brick, concrete or stone pillars are used, they need to be attached to a profile pipe-plate (usually 60*30, which is attached to the pillar using mortgages, and in their absence, to dowels, anchors, fittings, etc.
Installation of the upper limiter (upper rollers)
 :
:
If you have peaks or a semicircular arch of peaks on your gate, then a so-called portal is used - a U-shaped structure is welded near the pillar, allowing your peaks to pass through in height. The upper limiter is cut in two and welded to the portal so that the rollers “clasp” the gate on both sides. To do this, you need to provide a pipe (flat surface) along which the rollers of the upper limiter will roll. See pic:


Or using a remote pipe (60x40), if it is not possible to implement it as in the photo above, i.e. this way: More details.

Attaching catchers to the strip.
To mount the carriages, you can use a special accessory - adjustment platforms, with their help you can adjust the gate height and eliminate distortions, within some reasonable limits. And also “get out of the situation” in case of any miscalculation. But if all the levels are set correctly and the foundation level is not “filled up,” then your gate will stand correctly and without any adjustments.

The supports are welded to the channel and the carriage is secured with nuts. Do-it-yourself sliding gates will cost you significantly less than ordering "turnkey" from companies. To do this you will need We are always ready to provide you with a wide selection of components for sliding gates and affordable prices. This material will certainly help you make your own sliding gates easily, quickly and without unnecessary overpayments! Assemble the sliding gates yourself - save your money.
Still have questions? Call and our managers will be happy to advise you on all questions! Call or request a consultation.
